Table of Contents
ToggleBuilt-in storage cabinets have become one of the smartest investments homeowners can make when tackling clutter and maximizing usable floor space. Unlike freestanding furniture that eats into square footage, built-in cabinets fit seamlessly into walls and corners, delivering both practical storage and a polished, custom look. Whether you’re working with awkward alcoves, underutilized wall space, or simply tired of visual chaos, built-in storage cabinets offer a permanent solution that adds real value to your home. In 2026, customization options and DIY-friendly approaches make these projects more accessible than ever, though knowing whether to swing a hammer yourself or call in a pro is the first critical decision.
Key Takeaways
- Built-in storage cabinets maximize usable floor space and add real resale value by signaling thoughtful home renovation to potential buyers.
- Popular locations for built-in storage cabinets include bedrooms, living rooms, kitchens, and bathrooms, with each space offering unique organization and design benefits.
- DIY installation works for cosmetic, non-structural projects in stable walls, but electrical, plumbing, or structural work requires licensed professionals and permits.
- Accurate measurements, stud location, and material selection are critical planning steps that prevent costly mistakes and ensure built-ins last for decades.
- Material costs for a moderate built-in cabinet project range from $300–$800 for DIY work, while professional installation typically costs $800–$2,500 depending on complexity and region.
- Plan for 10–15% budget contingencies and factor finishing costs separately, as proper surface prep and paint or stain often determine whether a built-in looks custom or DIY.
Why Built-In Storage Cabinets Are Worth the Investment
Built-in storage cabinets solve a problem renters can’t fix and homeowners too often ignore: wasted vertical and horizontal space. Unlike shelving units that wobble or get shoved into a corner, built-in cabinets anchor securely to studs, offering rock-solid stability and a finished appearance that feels intentional rather than makeshift.
From a resale perspective, quality built-ins add perceived value far beyond their material cost. Buyers see custom storage as a sign of thoughtful renovation, not a quick fix. A kitchen with deep, organized pantry cabinets or a bedroom with floor-to-ceiling closet systems commands attention during showings.
Beyond dollars, built-ins deliver daily convenience. Toys vanish from the living room into concealed compartments. Linens stay dust-free in bedroom cupboards. Cleaning supplies hide behind cabinet doors instead of littering under the sink. You’re not just storing stuff, you’re reclaiming visual calm and making your home function better.
Popular Locations and Design Styles for Built-In Cabinets
Bedroom and Living Room Options
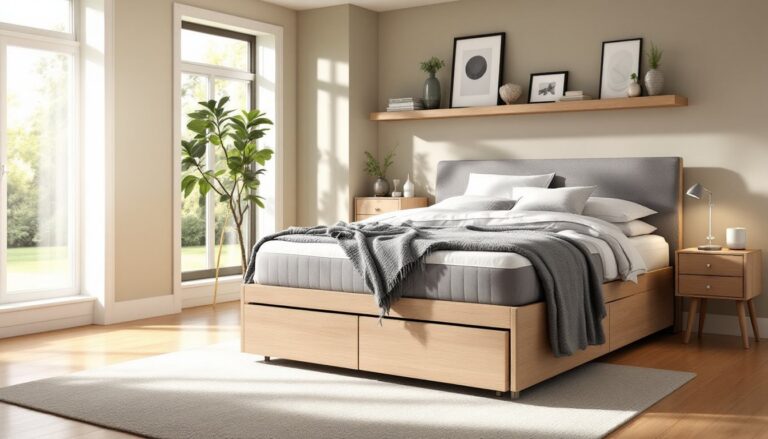
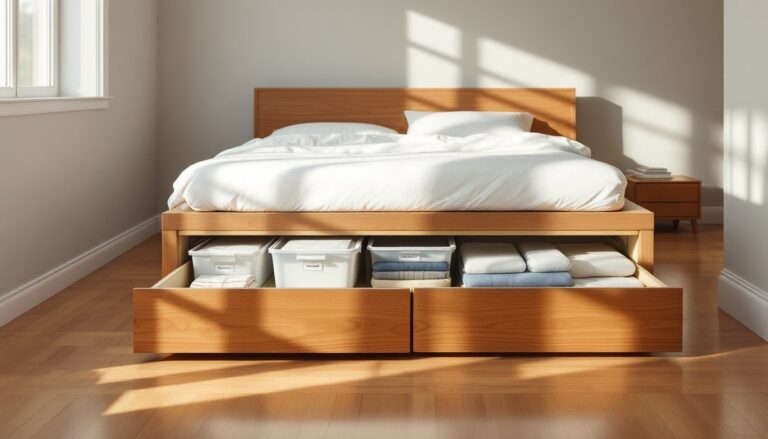
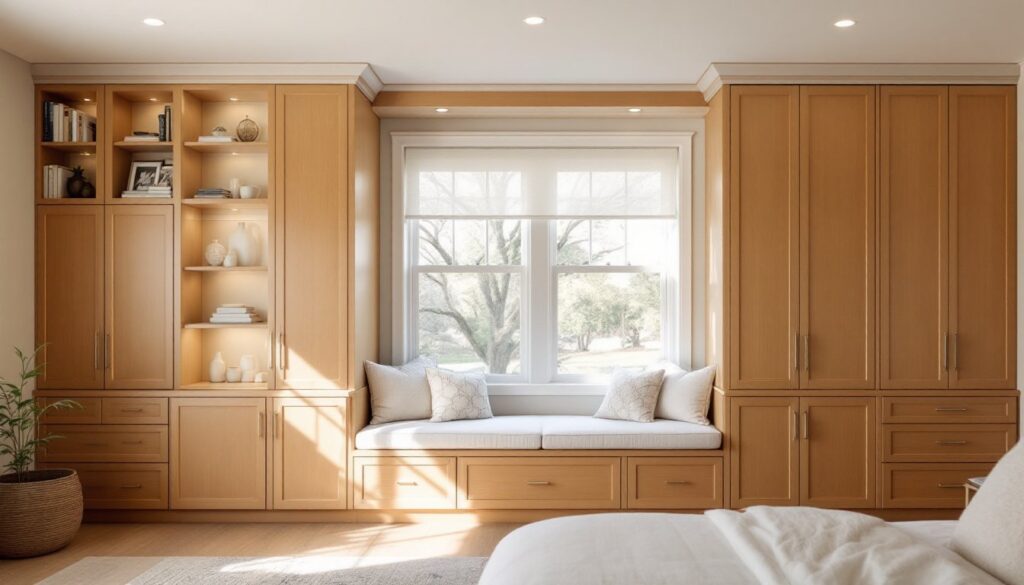
Bedroom built-ins typically flank a window seat or consume an entire wall between floor and ceiling. Window seat cabinets offer hidden storage beneath cushioned seating, perfect for off-season blankets or keepsakes. Full-wall systems create a display and storage hub that anchors the room’s design. Open shelving on top with closed storage below works well for displaying decorative items while hiding clutter.
Living room built-ins often surround fireplaces or run the length of a wall. These showcase books, family photos, or collections while stashing remotes, game controllers, and forgotten cables behind cabinet doors. Shaker-style frame-and-panel doors with soft-close hinges give a timeless, quality feel that doesn’t scream “DIY.”
Kitchen and Bathroom Installations
Kitchen pantry cabinets are high-ROI additions. A walk-in pantry with floor-to-ceiling shelving beats counter-top clutter every time. Bathrooms benefit from vanity-top medicine cabinets and under-sink organization that keeps grooming products and medications out of sight. Ensure bathroom cabinets include proper ventilation to prevent moisture damage, select moisture-resistant plywood or MDF for these wet environments.
For both locations, consider vertical space ruthlessly. A kitchen built-in that reaches the soffit (the space between cabinet tops and ceiling) captures storage real estate most people leave empty. In bathrooms, above-toilet cabinets add storage without taking up floor space, essential in compact layouts.
DIY vs. Professional Installation: What You Need to Know
Taking on a built-in cabinet project yourself is entirely realistic if you have basic carpentry skills, the right tools, and honesty about your limits. Simple box cabinets with basic doors and shelves, the kind featured on The Handyman’s Daughter, are manageable weekend projects for someone comfortable with a miter saw and a drill.
But, several red flags warrant hiring a professional. If your walls are out of plumb (crooked) or uneven, built-ins require shimming and scribing to fit properly. If the project involves electrical (recessed lighting inside cabinets) or plumbing (vanity cabinets), a licensed professional is necessary and usually required by code. Structural work, removing or building around load-bearing studs, demands a contractor’s expertise and often a permit.
DIY shines for cosmetic, non-structural work in already-stable walls. Professional installation makes sense when precision, custom joinery, or finishing touches like crown molding and trim are critical. A hybrid approach also works: order semi-custom cabinet boxes and install them yourself, saving on labor while avoiding the steepest learning curve.
Step-by-Step Guide to Planning Your Built-In Cabinet Project
Start with accurate measurements. Measure wall height at multiple points, old houses settle unevenly, and what looks level might be off by a quarter-inch over 8 feet. Use a laser level, not a bubble level, for precision. Measure depth from the wall to any obstacles (baseboards, trim, radiators). Take photos and sketch dimensions in a notebook.
Next, locate studs. A stud finder saves guesswork: mark them with painter’s tape every 16 inches (standard on-center spacing). Studs are where you’ll anchor the cabinet frame securely. Know your wall type, too, plaster, drywall, or tile demand different fastening approaches.
Decide on materials. Plywood (3/4-inch thick) is standard for cabinet sides, shelves, and fixed frames. Select exterior-grade plywood (fewer voids, more stable) for built-ins that’ll last decades. Doors can be solid wood, plywood with edge banding, or frame-and-panel (more finished-looking, more work). MDF is budget-friendly but won’t hold a screw as well as plywood in high-traffic areas.
Sketch your design showing shelf spacing, door locations, and decorative elements. Account for nominal vs. actual lumber: “1-inch” boards are 3/4-inch thick: “2-inch” studs are 1.5 inches. This detail prevents awkward gaps or overhangs. Reference designs like those from Ana White’s community-driven plans to see how others solved similar spaces.
Draw an elevation view (front view) and side view marking stud locations, shelf heights, and door swing direction. This prevents surprises mid-build. Finally, list every screw, hinge, paint, and hardware item needed, nothing derails a weekend project like a missing piece of trim.
Cost Considerations and Budget Planning
Material costs for a moderate built-in (say, 8 feet wide by 7 feet tall with three shelves and two doors) range from $300 to $800 depending on wood grade and hardware. Plywood runs $40–$70 per sheet: quality hinges cost $8–$15 each. Stain and finish add $50–$150. These are rough estimates, local lumber pricing and your material choices matter enormously.
Labor costs shift the equation. Professional installation typically runs $800–$2,500 for a comparable project, depending on region and complexity. Custom cabinetry doubles or triples that. DIY saves labor but demands your time: expect 20–40 hours for a first built-in, less for subsequent projects.
Factors that spike costs: custom wood species, soft-close hinges, decorative trim, crown molding, interior lighting, and paint finishes. A simple shelving unit with basic plywood doors costs far less than hand-built frame-and-panel cabinetry with intricate joinery.
When budgeting, add 10–15% for contingencies, you’ll almost always encounter a stud in the wrong place or need shims to correct wall unevenness. Get materials delivered if possible: hauling sheets of plywood is miserable. Check Family Handyman for real project costs and community experiences, their forums offer unfiltered feedback on pricing and material choices from people who’ve actually built what you’re planning.
Consider finishing costs separately. Painting a built-in costs $100–$300 in materials and brushes if you DIY, or $500–$1,500 if you hire a painter. Stain and polyurethane run similar ranges. Don’t underestimate finishing, it’s often the difference between “looks DIY” and “looks custom.”
<h2 id="” data-id=””>Getting Started: Your Next Step
Built-in storage cabinets aren’t just storage, they’re an investment in your home’s function and appearance. Start small if you’re new to carpentry: a simple closet shelf system or a window-seat base teaches the fundamentals before you tackle a full wall.
Measure twice, plan thoroughly, and don’t skip surface prep or finishing. These projects reward patience and punish rushing. Whether you build them yourself or hire help, a well-executed built-in cabinet will serve your home for decades, paying dividends every single day in organized calm and reclaimed space.